Crafts · Harvest Home
Harvest Loaves
A wheatsheaf for Harvest Home; a step-by-step guide to shaping, baking, and keeping a harvest loaf.
þindan ond þunian, þecene hebban.
On þæt banlease bryd grapode,
hygewlonc hondum; hrægle þeahte
þrindende þing þeodnes dohtor.
Modern English
swelling and bulging, lifting its cover. A proud-hearted bride grasped that boneless thing with her hands; a lord’s daughter wrapped that swelling thing in a cloth.
I have made harvest loaves for more than twenty years, usually for the traditional Harvest Home season. I never wrote my recipe or methods until now. This guide brings together my techniques into a form that can be easily followed in any American kitchen.
The sheaf is built a little at a time: a flat backing supports the stalks; overlapping ears fill the head; a braid binds the waist. The small cuts made at the end turn plain pieces of dough into grain.
- Makes
- One compact sheaf
About 10–12 inches tall - Allow
- 1½–2 hours for making
25–30 minutes for the first bake - For a display loaf
- Allow another 3–5 hours
for drying, then cool fully
Gather the ingredients
A firm, workable dough
| Bread flour | 17.6 ounces (about 4¼ cups), plus a little for dusting |
|---|---|
| Instant yeast | ½ teaspoon |
| Granulated sugar | 1 teaspoon |
| Fine salt | ½ teaspoon |
| Lukewarm water | 1¼ cups + 1 teaspoon, plus a little for joining pieces |
| Egg | 1 large, beaten, for the glaze |
Weigh the flour if possible. For cups, spoon it lightly into the measure and level it; the cup equivalent is approximate. [2]
About the method. The dough and baking schedule follow a low-yeast approach. Shape it after kneading and bake as soon as it is finished; there is no separate rise to double its size. The longer drying stage is optional.
Before shaping
Mix and divide
1. Make the dough
Stir together the flour, yeast, sugar, and salt. Add the measured water and mix until no dry flour remains. Knead on a lightly floured surface for about 8–10 minutes, until smooth and firm enough to hold a small shaped piece.
If it is crumbly, knead in water a teaspoon at a time. If sticky, keep kneading before adding a light dusting of flour.
2. Prepare the work
Line the sheet with parchment. Divide the dough into three equal portions, roughly 9½ ounces each: one for the backing and braid, one for stalks, and one for ears. Keep unused dough covered.
If the dough springs back, let it relax under a cover for 5–10 minutes. If shaping is slow and it starts puffing noticeably, briefly refrigerate the unused portions.
Building the sheaf
From backing to grain
Step 3 · Illustration I
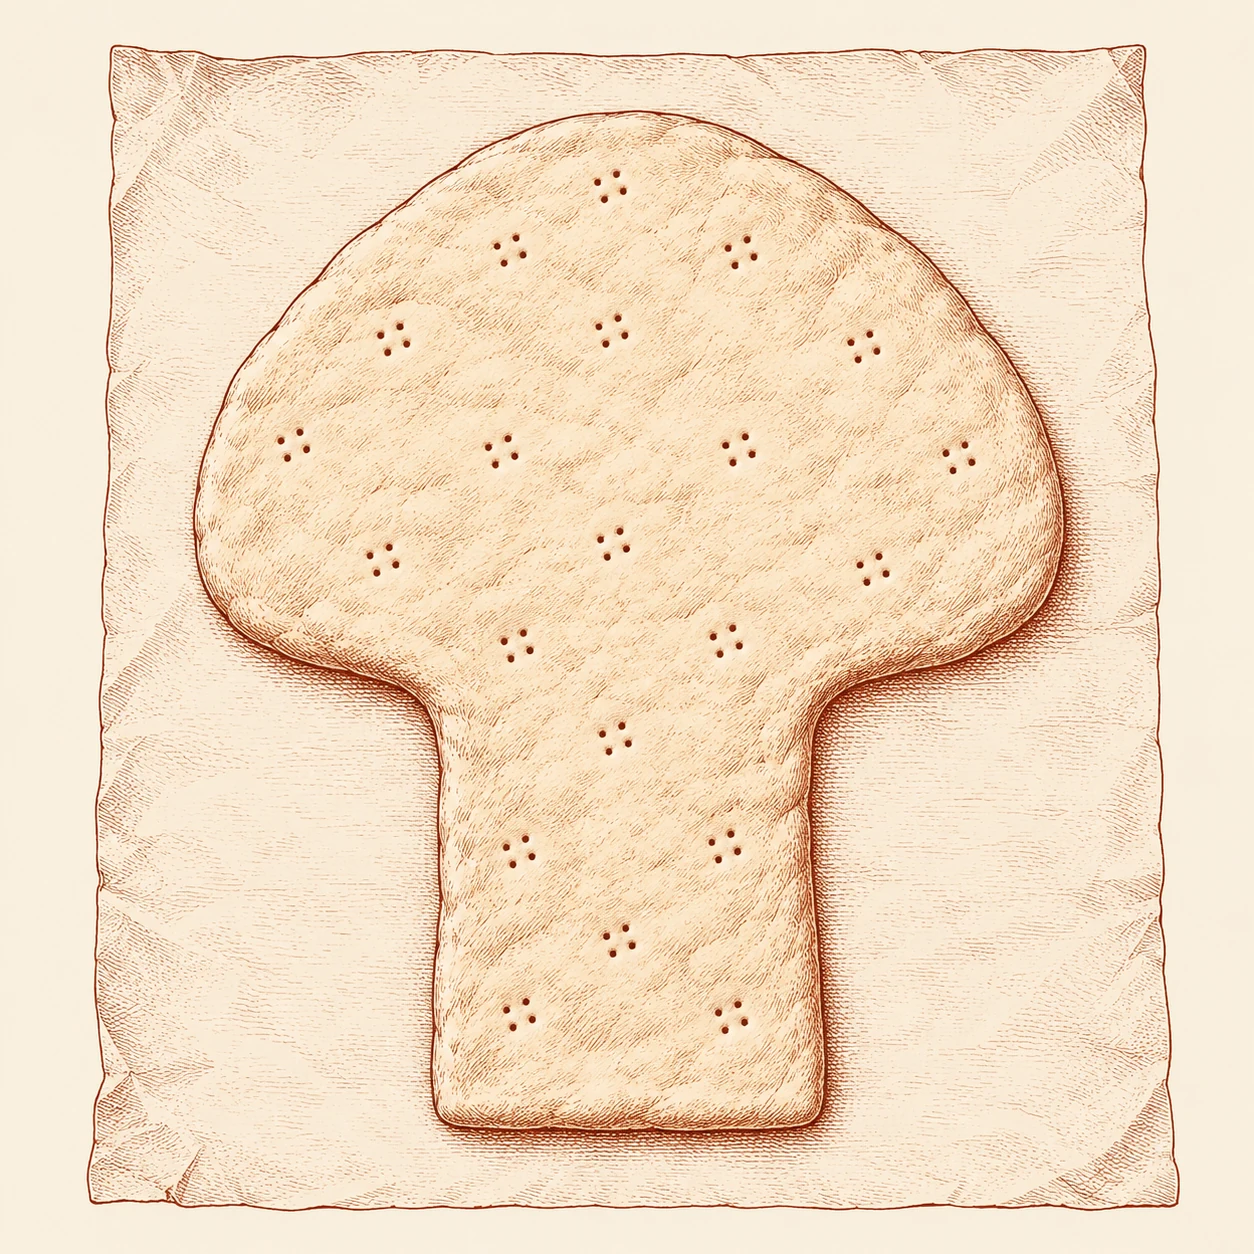
Cut the backing
Roll the first portion about ¼ inch thick. Cut a broad, rounded fan with a narrow stem beneath it, like a mushroom with a long stalk. Aim for a backing about 10 inches tall and 7½ inches across, with a stem about 3 inches wide.
Keep the trimmings covered for the braid. Put the backing on the parchment now; all the remaining work happens on the sheet. Prick it with a fork and brush it lightly with water.
Step 4 · Illustration II
Lay the stalks
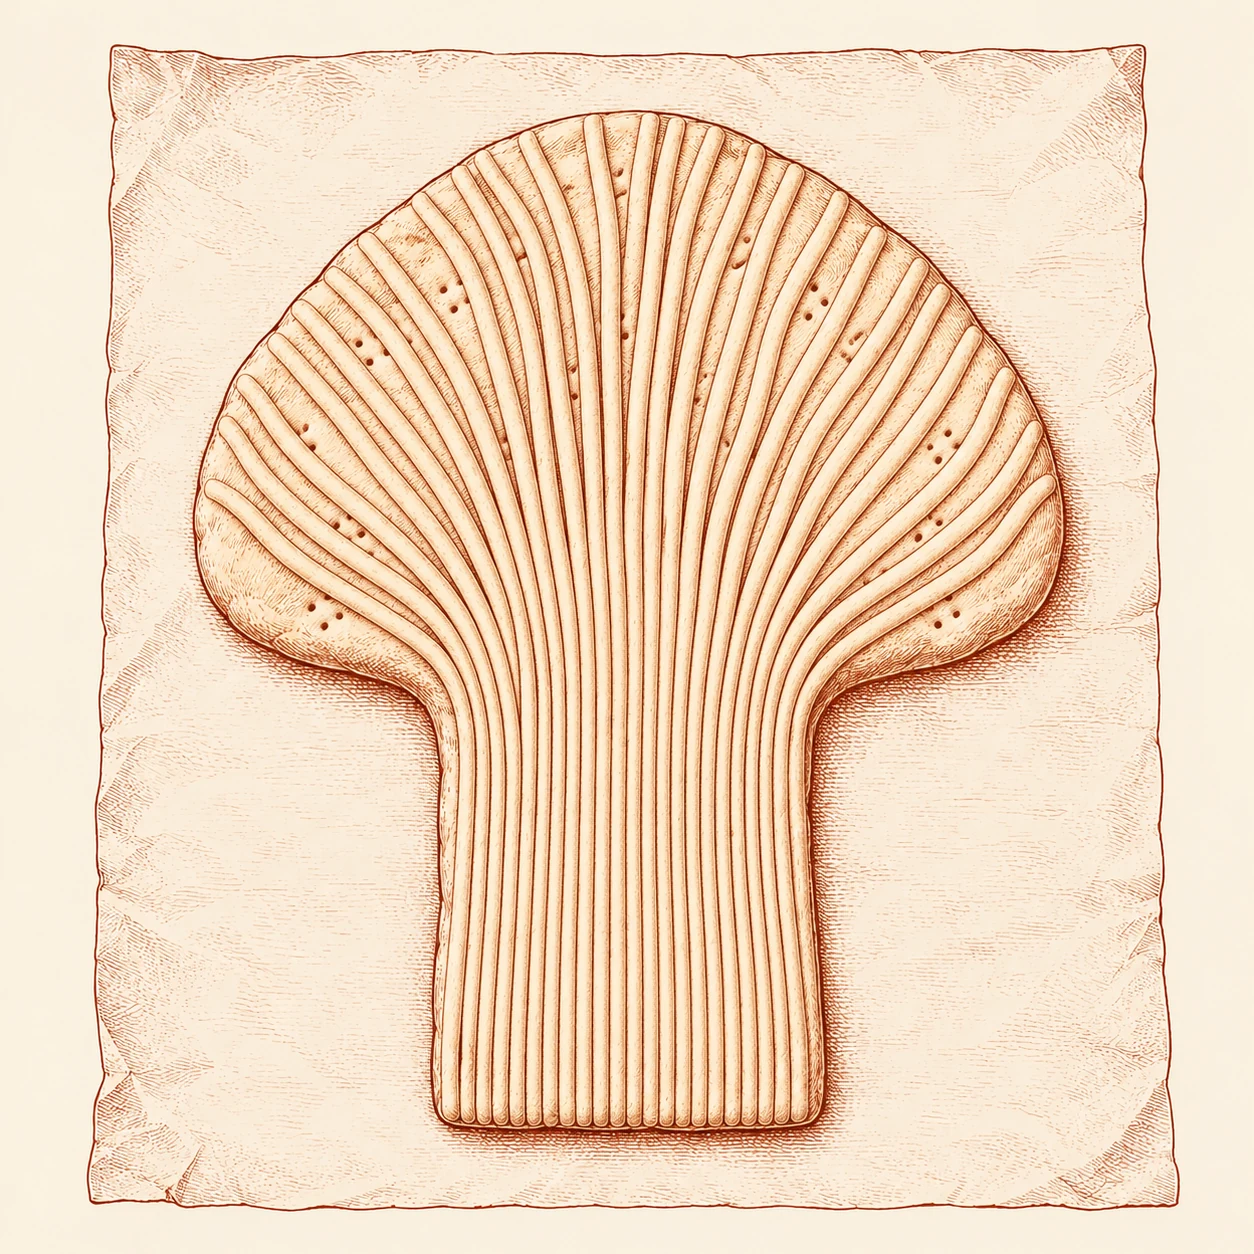
Divide the second portion into about 30 pieces. Roll them into slender cords, roughly 8–9 inches long. Lay them side by side over the stem, spreading their upper ends outward across the fan.
Keep the lower ends level. Press gently where each cord meets the damp backing, without flattening the rounded stalks. Save any small offcuts with the braid dough.
Step 5 · Illustration III
Begin the ears at the edge
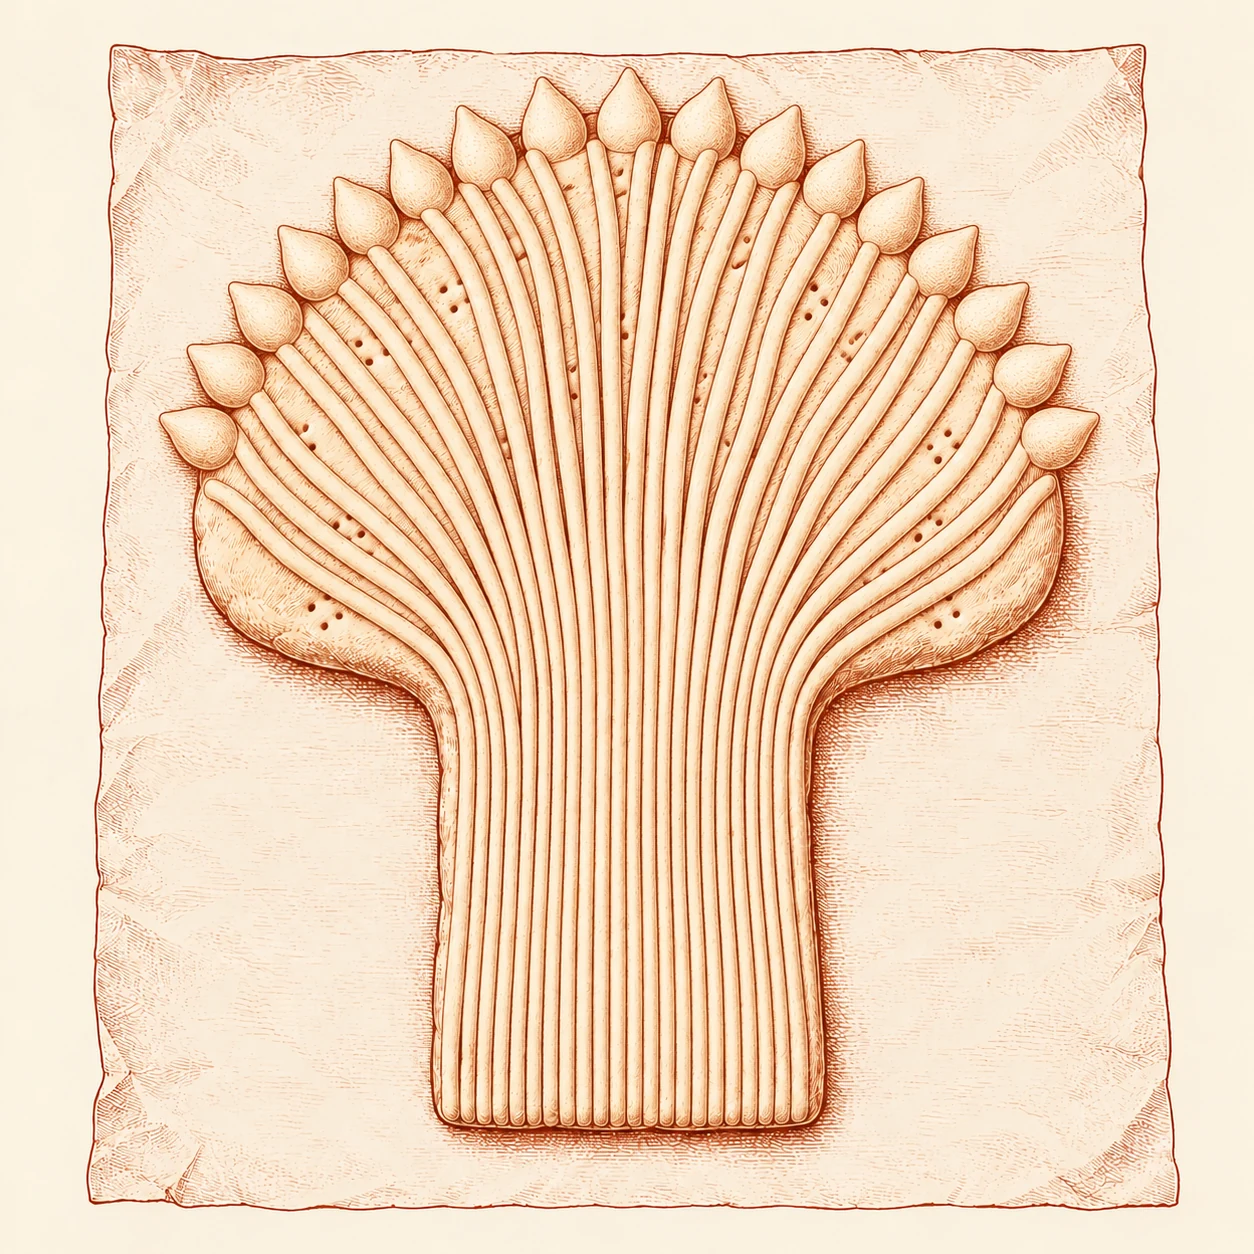
Divide the last portion into three smaller batches, then each batch into about 20 pieces. Shape each piece into a small oval with a pointed tip, about an inch long. These will become the ears of grain.
Begin along the top and outer curve of the fan. Point the tips upward and outward, letting them project a little beyond the backing. Dampen each joining surface sparingly so the pieces hold.
Step 6 · Illustration IV
Fill the head and bind it
Work inward and downward in overlapping rows. Cover the bases of the row above, keeping the tips visible. Fit the remaining ears into gaps until the fan is full; leave the lower stalks exposed.
Roll the reserved trimmings into three thin cords about 8–10 inches long. Pinch their ends together, braid them, and lay the braid across the waist just below the grain. Moisten the contact points and tuck the ends beneath the loaf.
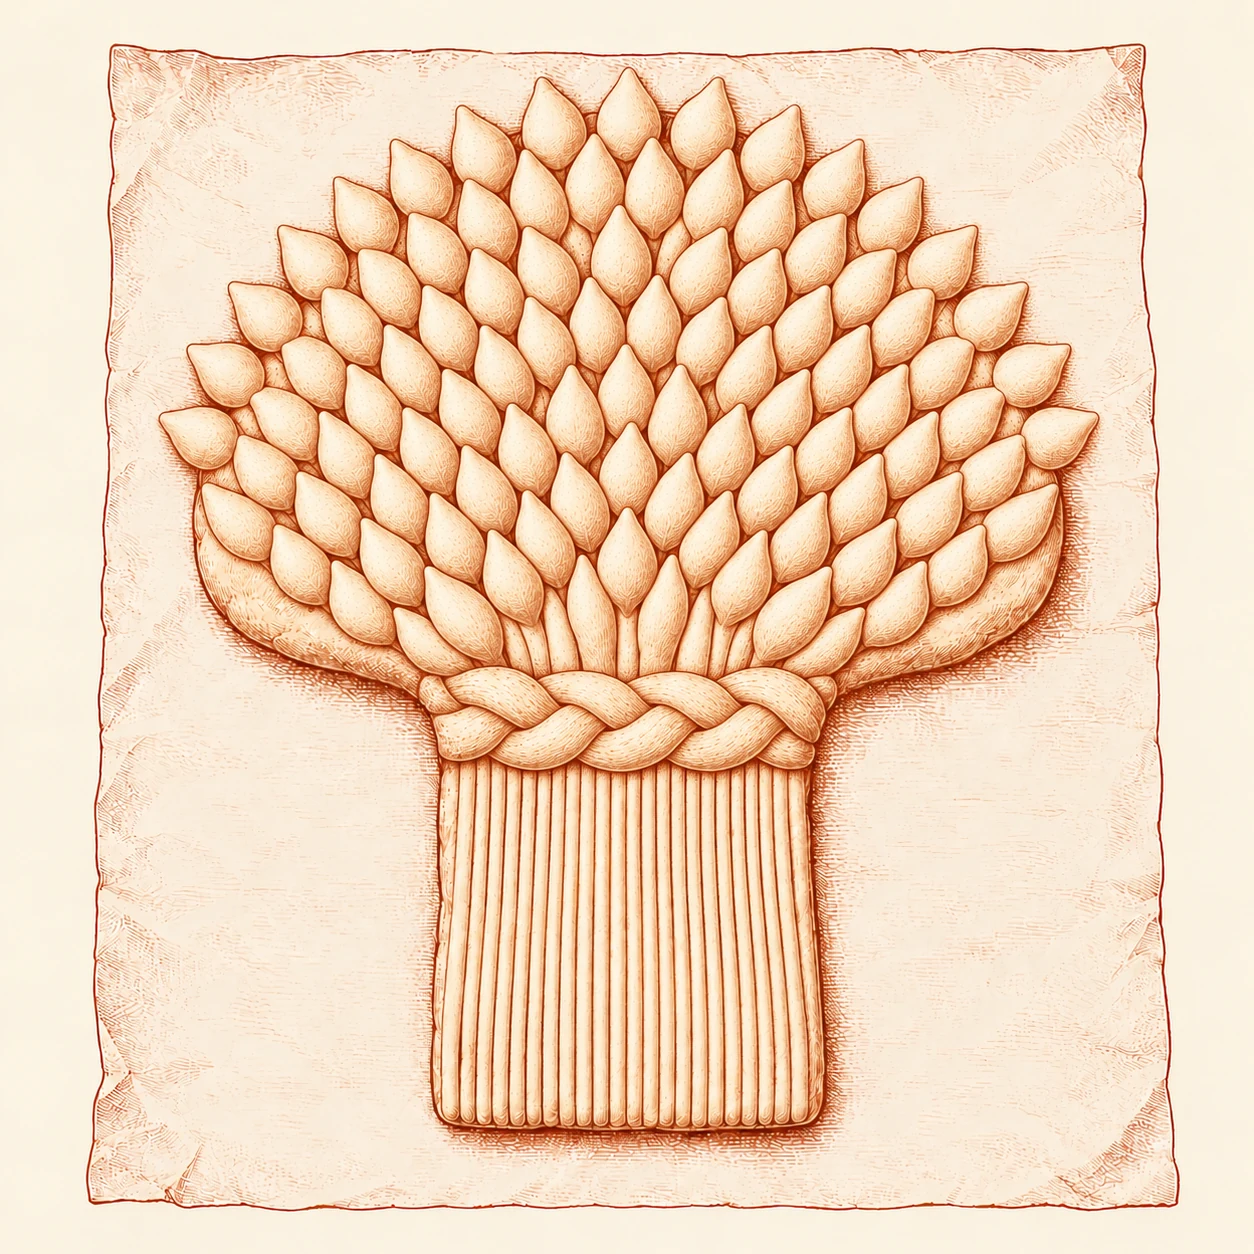
Step 7 · Illustration V
Glaze, then snip
Heat a conventional oven to 400°F. Brush the whole loaf with a thin coat of beaten egg, reaching into the joins without leaving puddles.
With the tips of clean scissors, make three or four shallow, angled snips into each ear to suggest the grain. Do not cut through to the backing. Work from the top row downward.
Glaze before snipping; brushing afterward can press the raised detail flat. Do not leave the finished loaf to rise.
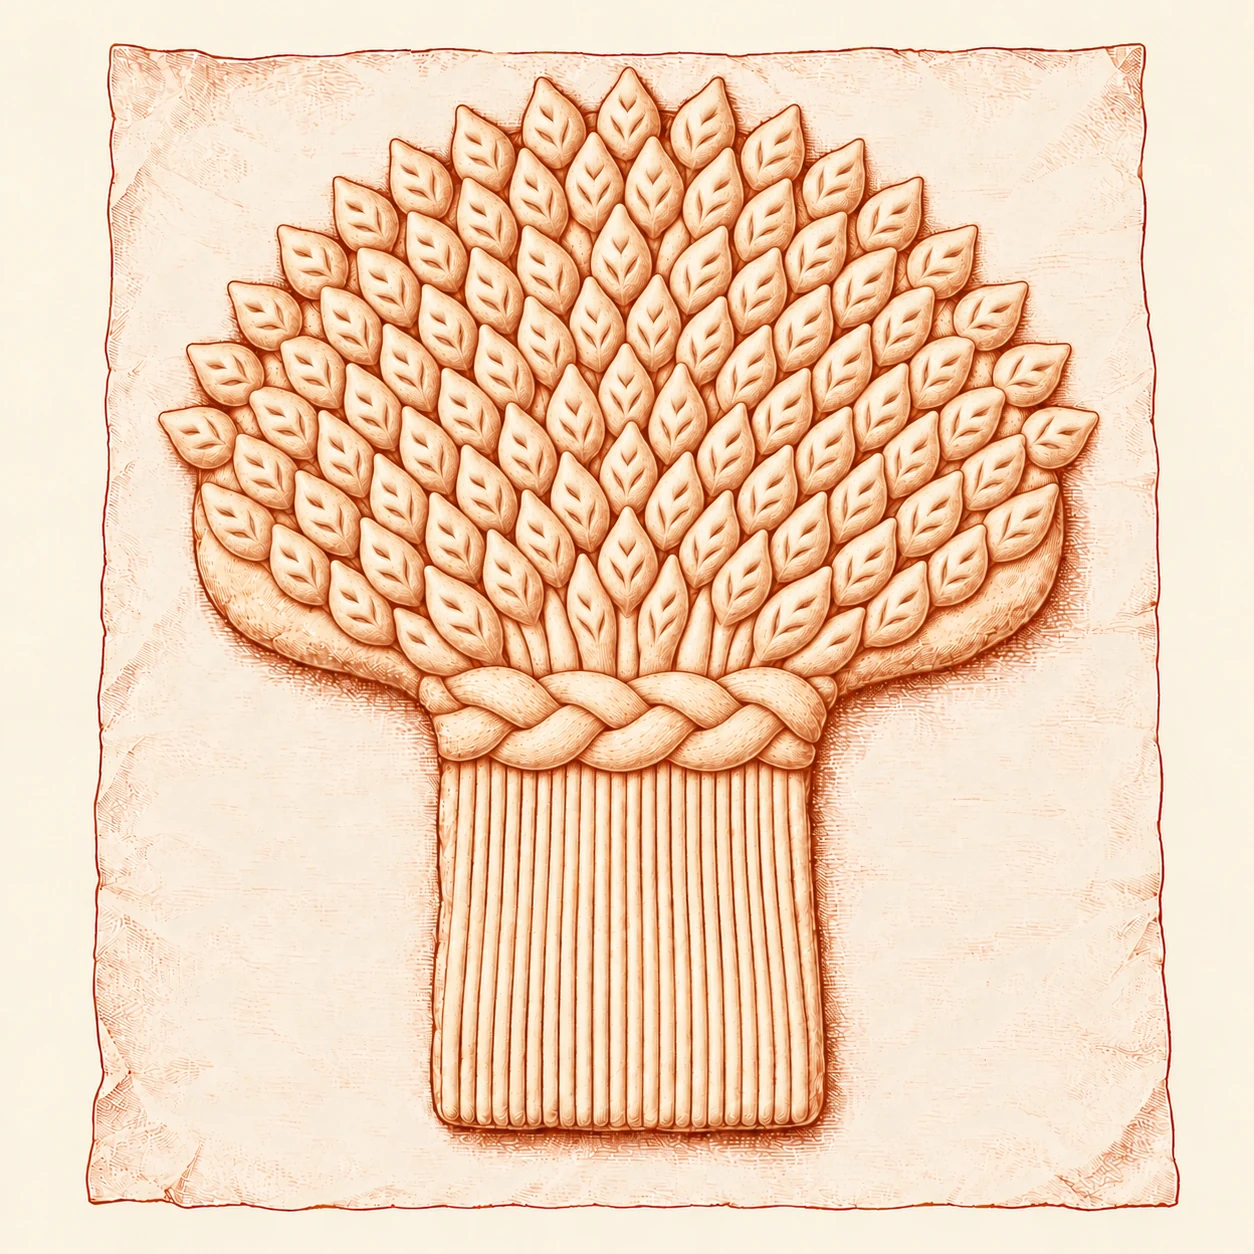
Step 8 · Illustration VI
Bake the sheaf
Bake on the middle rack at 400°F for 25–30 minutes, starting to check at 25 minutes. The loaf should be well colored and the underside firm. If the thick center is still doughy, give it more time; loosely tent the top with foil if the detail browns too quickly.
For a loaf to share at the table, finish here and transfer it carefully to a rack. Let it cool fully before breaking or cutting it. This firm decorative bread has a denser texture than an everyday sandwich loaf.
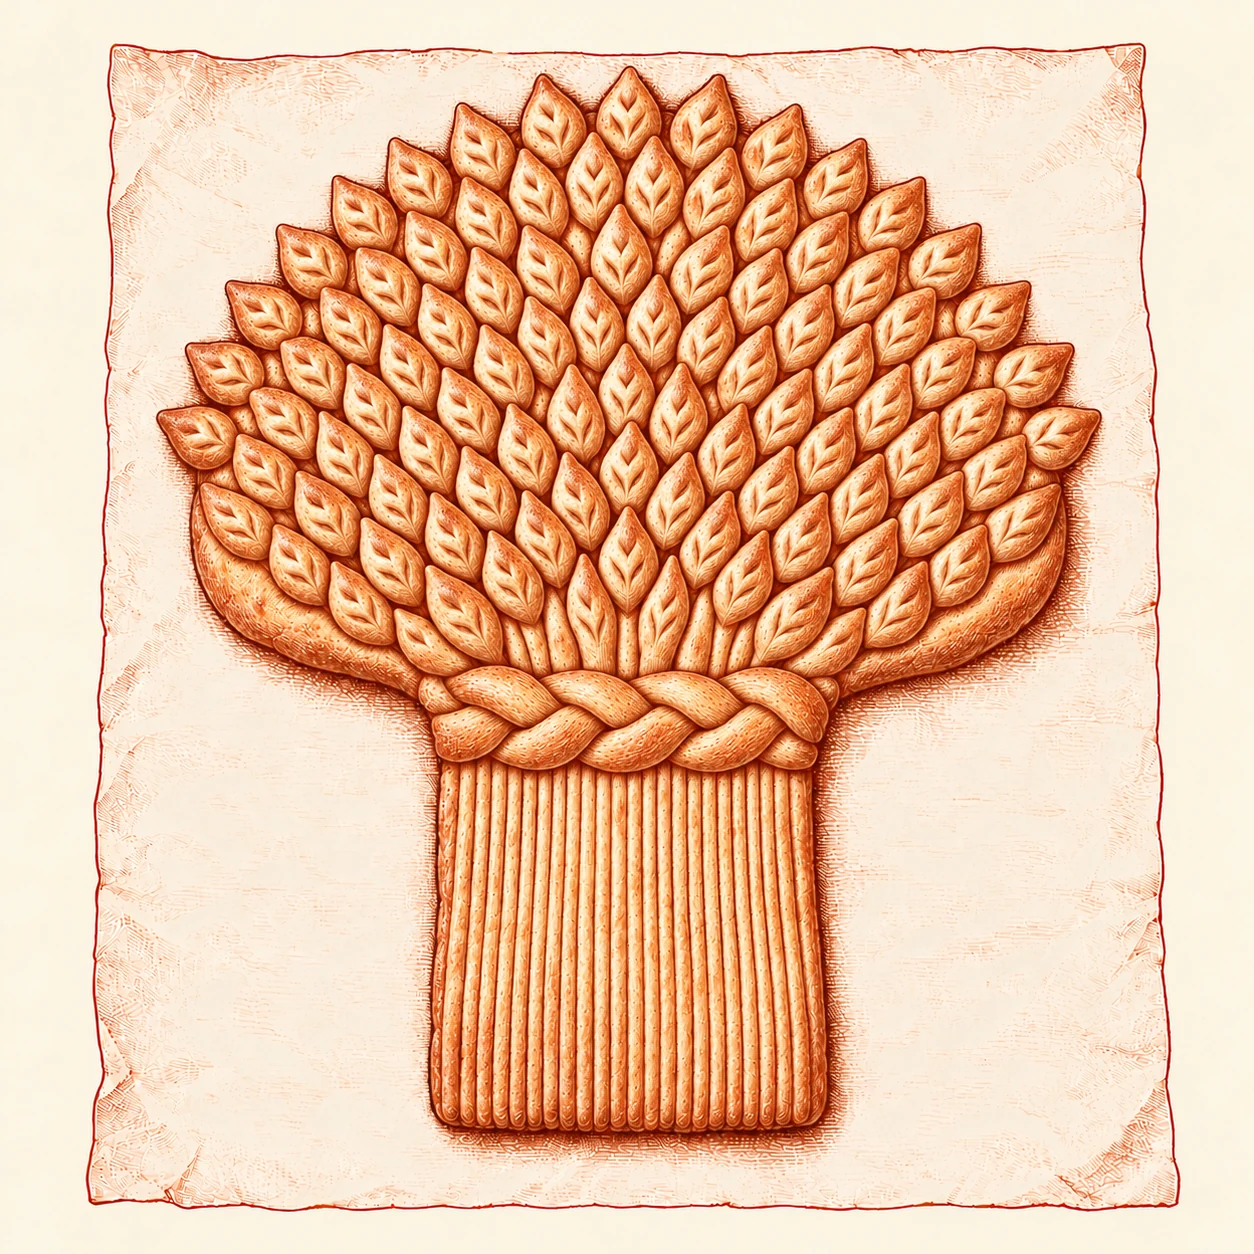
9. Dry it for display, if desired
After the first bake, lower the oven to 275°F and continue drying for 3–5 hours. Check about once an hour. The finished piece should be hard, rigid, and dry through its thickest part; a thicker loaf may take longer. Shield the top loosely with foil if necessary.
Cool completely on a rack before displaying or storing it. Keep it somewhere dry, supported on a flat surface. The long drying stage produces a display piece rather than a loaf intended for eating.
I have experimented with acrylic spray laquers in the past, and while they can extend the life of a display harvest loaf, it will eventually succumb to mold.
A few things to watch
Keep the dough covered. A dry skin makes cords crack and stops the ears adhering. Use water sparingly. Damp contact points join well; puddles make the base slippery. Handle the backing as little as possible. Build on the baking sheet and support the whole loaf when moving it.
Notes & sources
- The Exeter Book, Riddle 45, lines 2–5. Old English text: The Riddle Ages, “Exeter Riddle 45”, posted by Megan Cavell. The English beneath the epigraph is a new rendering for this page. The riddle’s solution is dough. ↩ Return
- King Arthur Baking, “Ingredient Weight Chart”. Reference for the approximate flour volume; weighing remains the more reliable measure. ↩ Return